
How to use PostgreSQL in your serverless app
In this example we will look at how to use PostgreSQL in our serverless app using Serverless Stack (SST). We’ll be creating a simple hit counter using Amazon Aurora Serverless.
Requirements
- Node.js >= 10.15.1
- We’ll be using Node.js (or ES) in this example but you can also use TypeScript
- An AWS account with the AWS CLI configured locally
Create an SST app
 Let’s start by creating an SST app.
$ npx create-serverless-stack@latest rest-api-postgresql
$ cd rest-api-postgresql
By default our app will be deployed to an environment (or stage) called dev and the us-east-1 AWS region. This can be changed in the sst.json in your project root.
{
  "name": "rest-api-postgresql",
  "stage": "dev",
  "region": "us-east-1"
}
Project layout
An SST app is made up of two parts.
-
lib/— App InfrastructureThe code that describes the infrastructure of your serverless app is placed in the
lib/directory of your project. SST uses AWS CDK, to create the infrastructure. -
src/— App CodeThe code that’s run when your API is invoked is placed in the
src/directory of your project.
Adding PostgreSQL
Amazon Aurora Serverless is an auto-scaling managed relational database that supports PostgreSQL.
Replace the lib/MyStack.js with the following.
import * as cdk from "@aws-cdk/core";
import * as ec2 from "@aws-cdk/aws-ec2";
import * as rds from "@aws-cdk/aws-rds";
import * as sst from "@serverless-stack/resources";

export default class MyStack extends sst.Stack {
  constructor(scope, id, props) {
    super(scope, id, props);

    const defaultDatabaseName = "CounterDB";

    // Create the VPC needed for the Aurora Serverless DB cluster
    const vpc = new ec2.Vpc(this, "CounterVPC");

    // Create the Serverless Aurora DB cluster
    const cluster = new rds.ServerlessCluster(this, "CounterDBCluster", {
      vpc,
      defaultDatabaseName,
      // Set the engine to Postgres
      engine: rds.DatabaseClusterEngine.AURORA_POSTGRESQL,
      parameterGroup: rds.ParameterGroup.fromParameterGroupName(
        this,
        "ParameterGroup",
        "default.aurora-postgresql10"
      ),
      // Optional, disable the instance from pausing after 5 minutes
      scaling: { autoPause: cdk.Duration.seconds(0) },
    });
  }
}
This creates a VPC and uses that to create our Aurora cluster. We also set the database engine to PostgreSQL. The databsse in the cluster that we’ll be using is called CounterDB (as set in the defaultDatabaseName variable).
Setting up the API
Now let’s add the API.
Add this below the rds.ServerlessCluster definition in lib/MyStack.js.
// Create a HTTP API
const api = new sst.Api(this, "Api", {
  routes: {
    "POST /": {
      function: {
        handler: "src/lambda.handler",
        environment: {
          dbName: defaultDatabaseName,
          clusterArn: cluster.clusterArn,
          secretArn: cluster.secret.secretArn,
        },
      },
    },
  },
});

// Grant access to the cluster from the Lambda function
cluster.grantDataApiAccess(api.getFunction("POST /"));

// Show the resource info in the output
this.addOutputs({
  ApiEndpoint: api.url,
  SecretArn: cluster.secret.secretArn,
  ClusterIdentifier: cluster.clusterIdentifier,
});
Our API simply has one endpoint (the root). When we make a POST request to this endpoint the Lambda function called handler in src/lambda.js will get invoked.
We also pass in the name of our database, the ARN of the database cluster, and the ARN of the secret that’ll help us login to our database. An ARN is an identifier that AWS uses. You can read more about it here.
We then allow our Lambda function to access our database cluster. Finally, we output the endpoint of our API, ARN of the secret and the name of the database cluster. We’ll be using these later in the example.
We need to install a couple of CDK packages that we are using.
From the project root run the following.
$ npx sst add-cdk @aws-cdk/aws-ec2 @aws-cdk/aws-rds
The reason we are using the add-cdk command instead of using an npm install, is because of a known issue with AWS CDK. Using mismatched versions of CDK packages can cause some unexpected problems down the road. The sst add-cdk command ensures that we install the right version of the package.
Reading from our database
Now in our function, we’ll start by reading from our PostgreSQL database.
Replace src/lambda.js with the following.
import client from "data-api-client";

const db = client({
  database: process.env.dbName,
  secretArn: process.env.secretArn,
  resourceArn: process.env.clusterArn,
});

export async function handler() {
  const { records } = await db.query(
    "SELECT tally FROM tblCounter where counter='hits'"
  );

  let count = records[0].tally;

  return {
    statusCode: 200,
    body: count,
  };
}
We are using the Data API. It allows us to connect to our database over HTTP using the data-api-client.
For now we’ll get the number of hits from a table called tblCounter and return it.
Let’s install the data-api-client.
$ npm install data-api-client
And test what we have so far.
Starting your dev environment
SST features a Live Lambda Development environment that allows you to work on your serverless apps live.
$ npx sst start
The first time you run this command it’ll take a couple of minutes to deploy your app and a debug stack to power the Live Lambda Development environment.
===============
 Deploying app
===============

Preparing your SST app
Transpiling source
Linting source
Deploying stacks
dev-rest-api-postgresql-my-stack: deploying...

 ✅  dev-rest-api-postgresql-my-stack


Stack dev-rest-api-postgresql-my-stack
  Status: deployed
  Outputs:
    SecretArn: arn:aws:secretsmanager:us-east-1:087220554750:secret:CounterDBClusterSecret247C4-MhR0f3WMmWBB-dnCizN
    ApiEndpoint: https://u3nnmgdigh.execute-api.us-east-1.amazonaws.com
    ClusterIdentifier: dev-rest-api-postgresql-counterdbcluster09367634-1wjmlf5ijd4be
The ApiEndpoint is the API we just created. While the SecretArn is what we need to login to our database securely. The ClusterIdentifier is the id of our database cluster.
Before we can test our endpoint let’s create the tblCounter table in our database.
Creating our table
To create our table we’ll use the query editor in the AWS console. First let’s grab the secret ARN to login to our database.
Head over to the Amazon RDS part of the console.
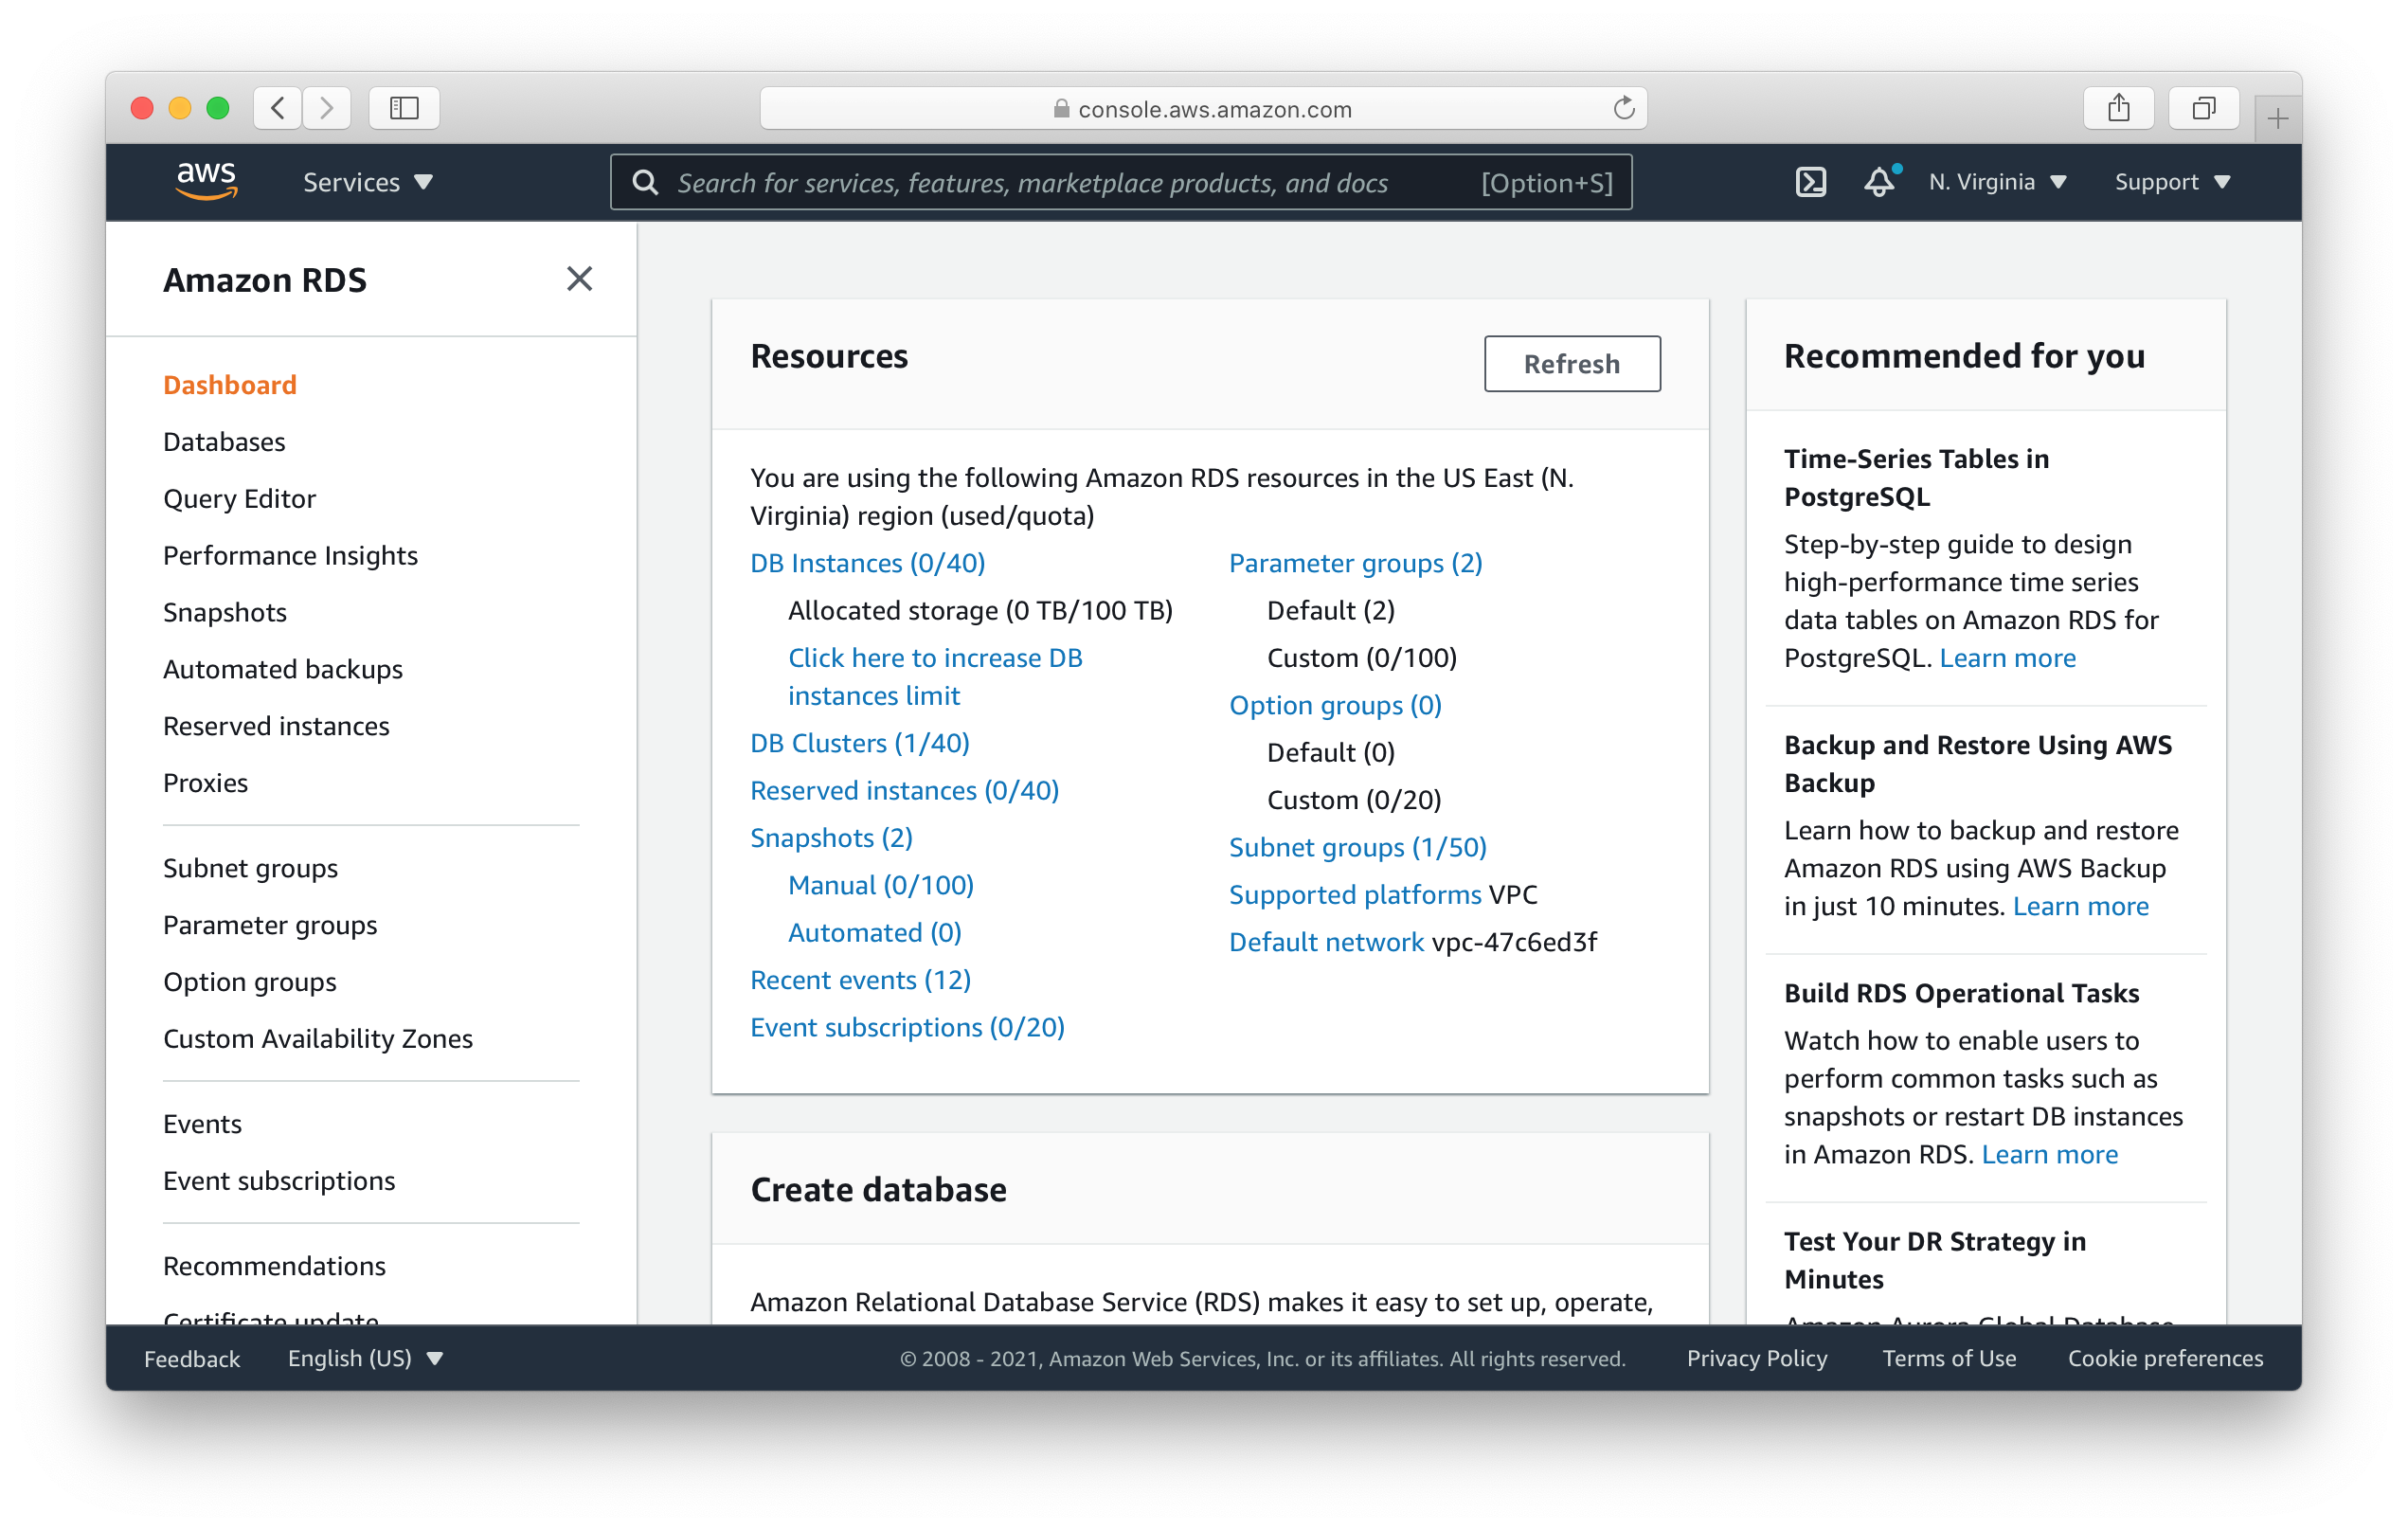
Here click on Query Editor. Now you’ll be asked to connect to your database.
- In the Database instance or cluster dropdown select the one matching the
ClusterIdentifierin our app outputs. - For the Database username select, Connect with a Secrets Manager ARN.
- Paste the
SecretArnfrom your app outputs in the Secret manager ARN field. - And paste the
CounterDB(or thedefaultDatabaseNamevariable inlib/MyStack.js) as the name of the database.
Then click Connect to database.

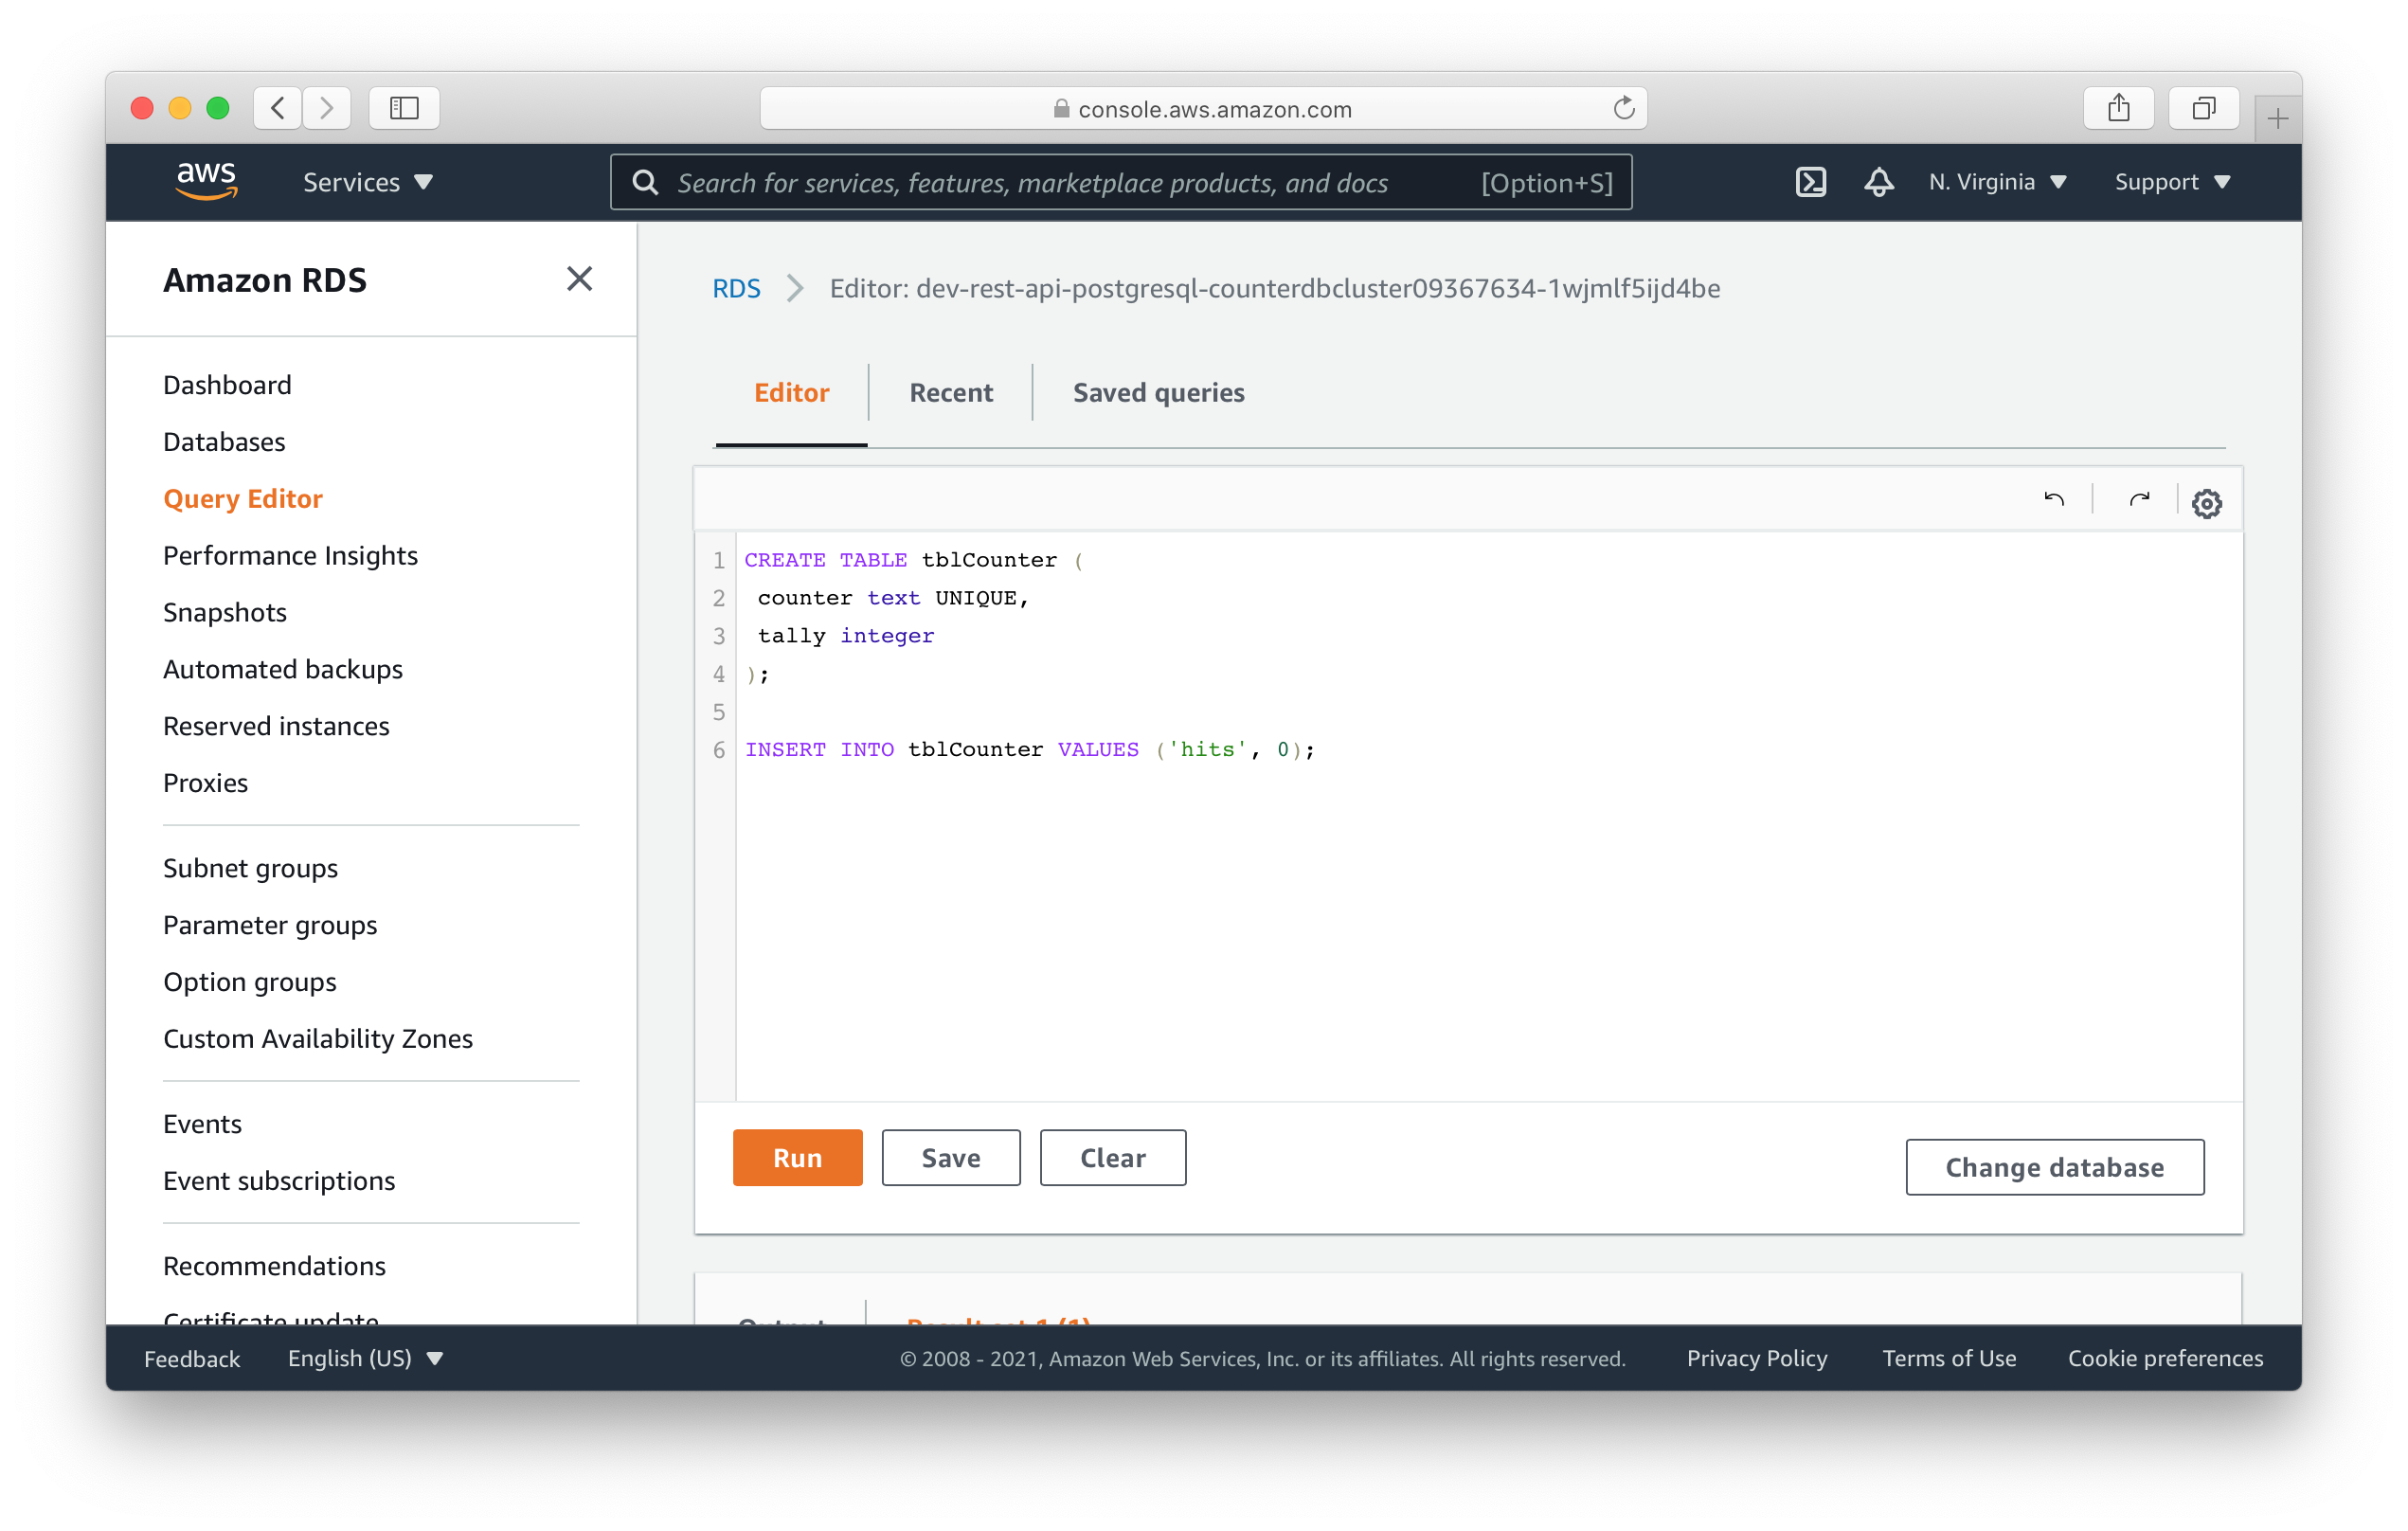
Paste the following queries. This will create our table and insert a row to keep track of our hits.
CREATE TABLE tblCounter (
 counter text UNIQUE,
 tally integer
);

INSERT INTO tblCounter VALUES ('hits', 0);
Hit Run.
Test our API
Now that our table is created, let’s test our endpoint. Run the following in your terminal.
$ curl -X POST https://u3nnmgdigh.execute-api.us-east-1.amazonaws.com
This makes a POST request to our API.
You should see a 0 printed out. Of course, if you call it again, nothing changes.
Writing to our table
So let’s update our table with the hits.
Add this above the return statement in src/lambda.js.
await db.query(`UPDATE tblCounter set tally=${++count} where counter='hits'`);
Here we are updating the hits row’s tally column with the increased count.
And now if you head over to your terminal and make a request to our API. You’ll notice the count increase!
$ curl -X POST https://u3nnmgdigh.execute-api.us-east-1.amazonaws.com
Deploying to prod
To wrap things up we’ll deploy our app to prod.
$ npx sst deploy --stage prod
This allows us to separate our environments, so when we are working in dev, it doesn’t break the API for our users.
Cleaning up
Finally, you can remove the resources created in this example using the following commands.
$ npx sst remove
$ npx sst remove --stage prod
Conclusion
And that’s it! We’ve got a completely serverless hit counter. And we can test our changes locally before deploying to AWS! Check out the repo below for the code we used in this example. And leave a comment if you have any questions!
Example repo for reference
github.com/serverless-stack/serverless-stack/tree/master/examples/rest-api-postgresqlFor help and discussion
Comments on this exampleMore Examples
APIs
GraphQL
Databases
- How to use DynamoDB in your serverless app
- How to use MongoDB in your serverless app
- How to use PostgreSQL in your serverless app
- How to create a CRUD API with serverless using DynamoDB